CLion
If you encounter problems during setup, please ask for help on discord
Initial project setup
Find your repository on the GitLab page of the course. It should be named like
mic-student-123Click on the blue
Codebutton on the top right and copy the URL displayed belowClone with SSH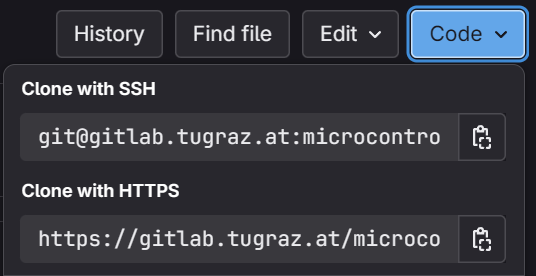
Open CLion and select
Get from VCSon the welcome screen or go toFile > New project from Version control...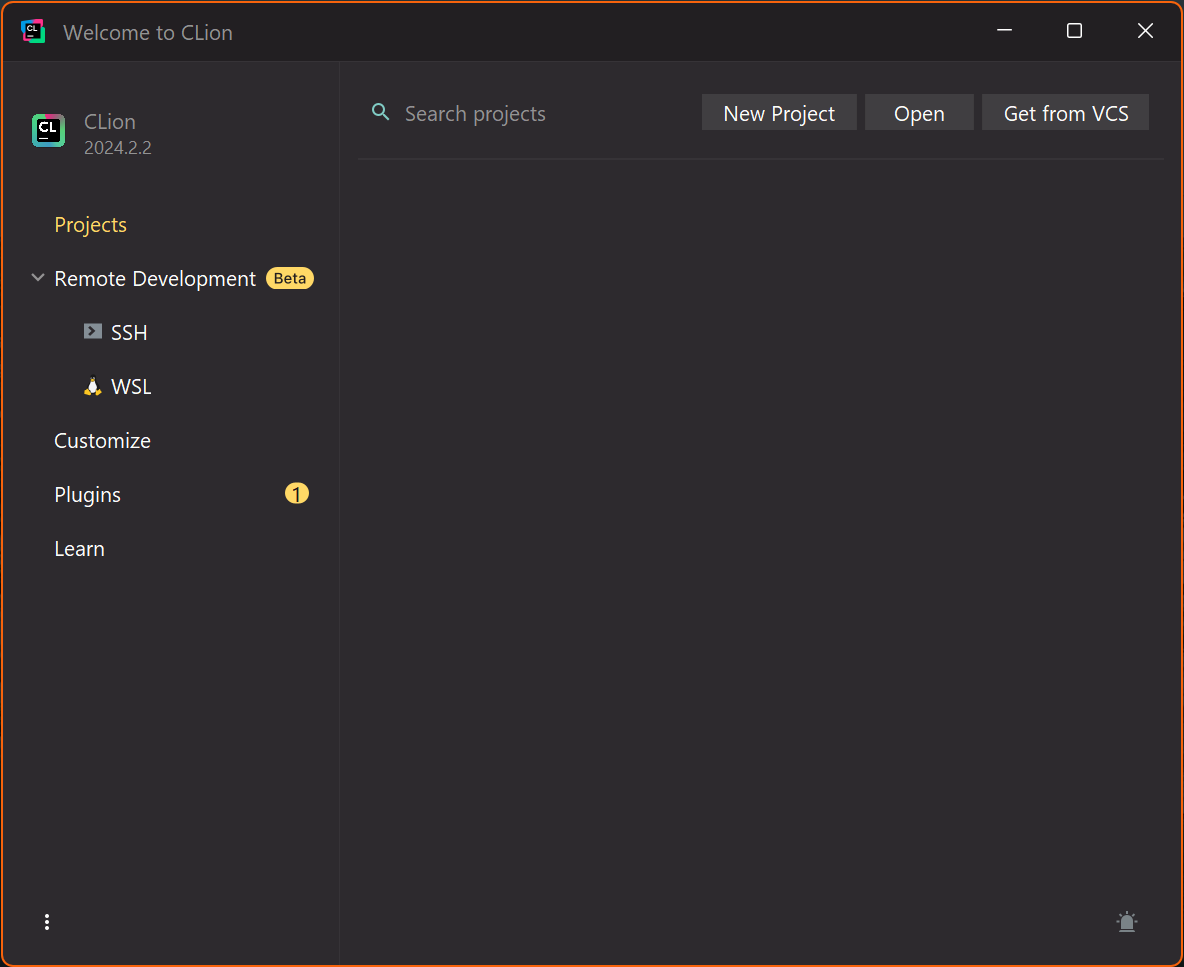
Paste the URL into the
URLfield and select the directory where you want to store the repository. Then pressClone.
You will be greeted with a dialog asking you to configure the CMake profile. Click on
Manage toolchains....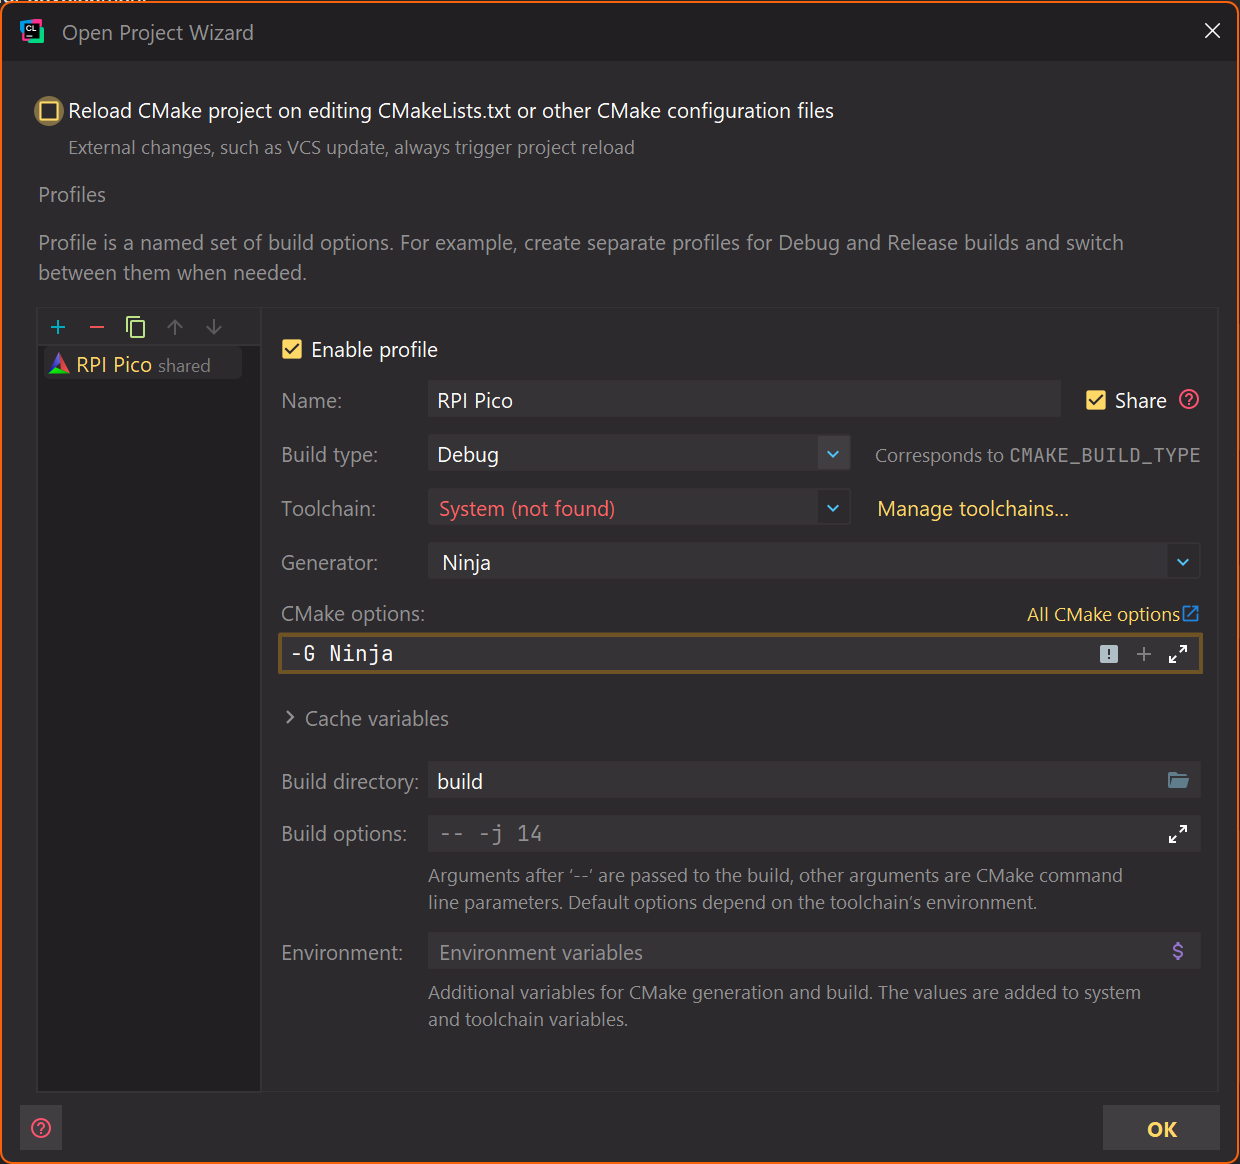
Add a new
Systemtoolchain by clicking on the+button and selecting theSystemtab. Make sure bundled CMake and GDB are selected,ninja.exeshould be detected as build tool.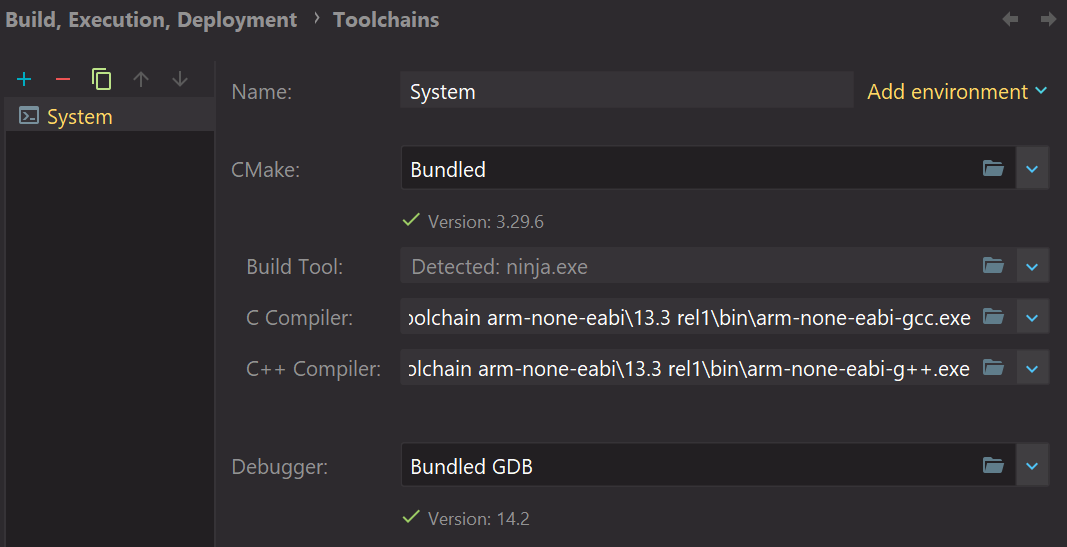
You will have to set the
C CompilerandC++ Compilermanually. On windows, the following paths should be used:
On linux or macOS, please get the path of arm-none-eabi-gcc and arm-none-eabi-g++ using
Then click on OK to create the toolchain.
Click on
OKin the CMake profile dialog to finish the setup.The IDE will notify you on the bottom right about missing plugins and to update the Windows Defender settings (if you are on Windows). Click on the notification and install the plugins and update the settings.
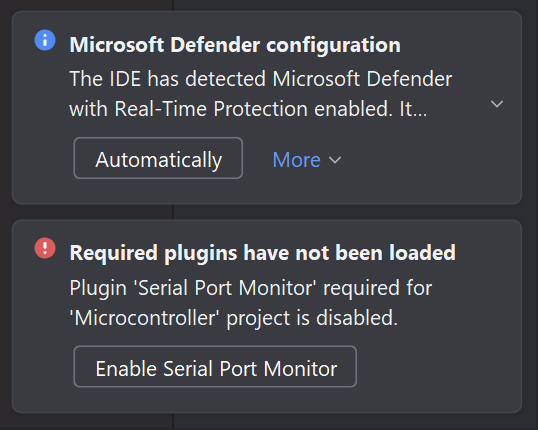
Open the setting by pressing
Ctrl + Alt + Sor by going toFile > Settings.... Search for Embedded Development and select theEmbedded Developmenttab.Change the OpenOCD Location to executeable located in
.openocd/x86_64_win/openocd.exeinside the project directory. If you are on Linux or macOS, you will have to select.openocd/[arch]/openocd. Make sure that the binary is executable (runchmod +x openocdin the binary directory). You can open the file browser by pressing on.... The Stm32CubeMX Location should be left empty, the window should look like this: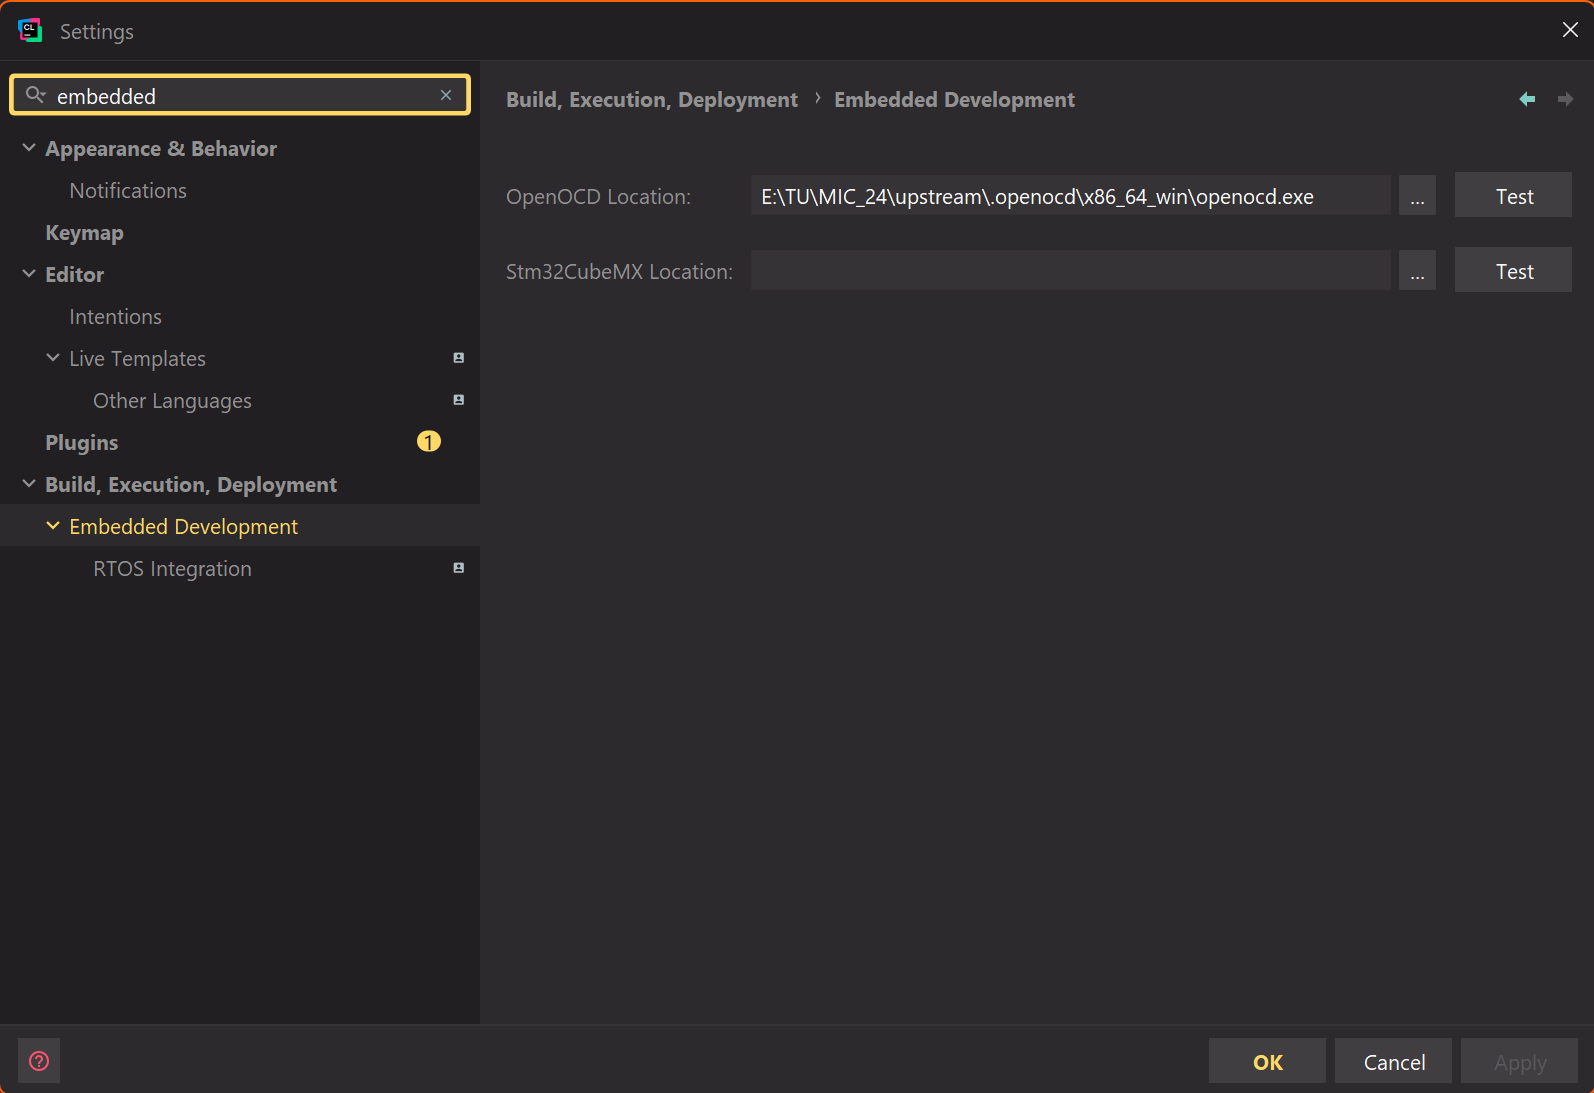
Press
OKto save the settings.
Flashing and running
On the top right, you can see a dropdown menu with preconfigured run configurations. Select the assignment which you want to flash and run. Then press the green play button to build, flash and run your code.

Make sure to select the run configuration with the microcontroller icon.
Your code will be compiled and flashed to the board. You can see the build output in the terminal at the bottom of the screen.
To access the serial output of the board, you can click on the

Serial Connectionstab at the bottom left of the screen. Select the COM port of the Pico, modify the settings to match those in the image below and press onConnect.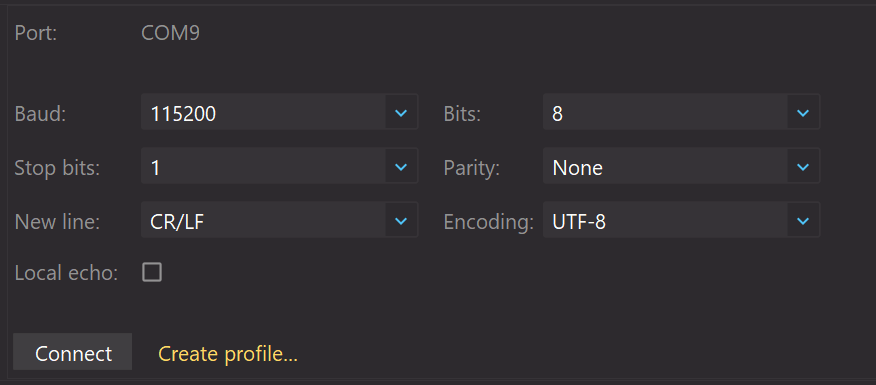
Your configuration should match the one shown in the image above.
Close the active serial connection tab and reconnect after flashing or restarting the board
Debugging
To start a debugging session, click the green bug icon next to the green play button.

Make sure to select the run configuration with the microcontroller icon.
The code will be compiled and flashed to the board. The debugger will start, and you can see the output in the

Debugtab at the bottom of the screen.You can set breakpoints by clicking on the left side of the line number. The program will stop at the breakpoint, and you can inspect the variables in the
Variablestab inThreads & Variables.To view the registers and their values, select the
Peripheralstab in theDebugwindow. When asked to load a svd file, select the file located in.openocd/svd/RP2040.svd.Use the debugger controls to step through the code, continue the execution or stop the debugging session. Hover over the buttons to see their function.

Debugging the hardware will be covered in assignment 0
To stop the debugging session, press the red square button in the top right corner of the screen.
Using the integrated Git
Committing and pushing changes
After making changes to your code, you have to commit and push them to the repository. This can be done directly in CLion.
Click on the

Committab on the left of the screen.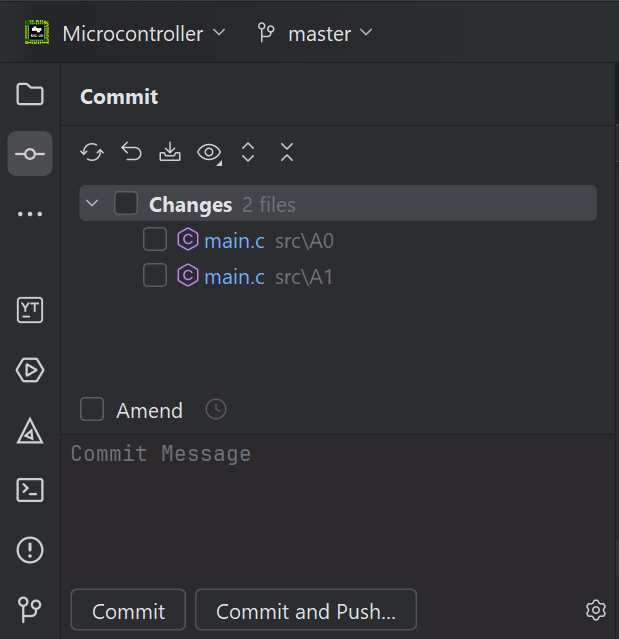
You will see a list of all changed files. Select the files you want to commit by clicking on the checkbox next to them.
Enter a commit message which briefly describes the changes you made.
Press
Commit and Push...to commit the changes to the repository and push them to the server. Confirm the dialog that appears.
Creating a tag
To create a tag for a specific commit, you can use the integrated Git functionality.
Click on the

Gittab on the left of the screen.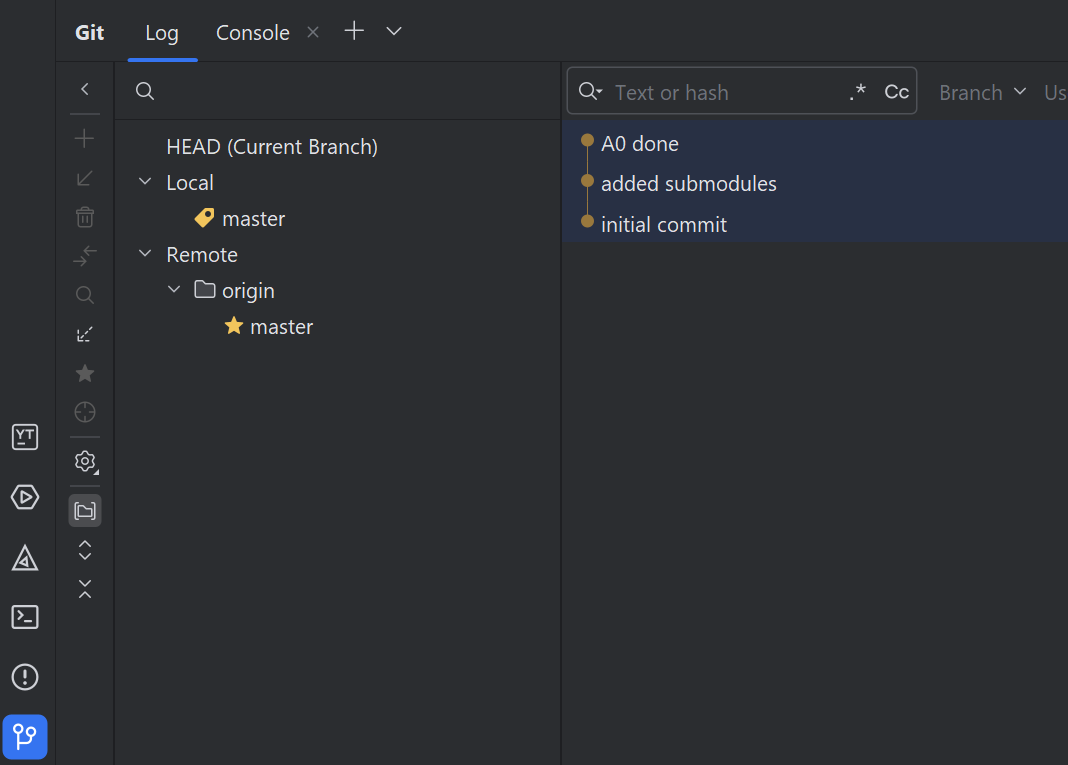
Right-click on the commit you want to tag and select
New Tag....Enter a name for the tag and press
OK.After creating the tag, you need to push it to the server. Right-click on the commit and select
Push All up to Here.Make sure to check the
Push tagscheckbox and selectAll, then pressPush.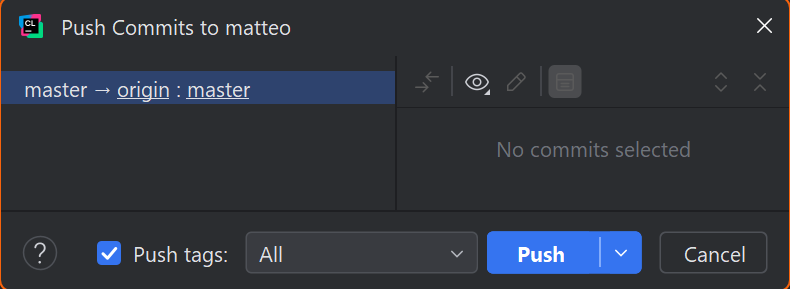
Your CLion setup is complete! 🎉
You can now start working on the assignments.