Connecting the Pico
Requirements
Student hardware containing the Raspberry Pi Pico
Raspberry Pi Debug probe and the necessary cables
2 USB to micro-USB cables
Step 1: Connecting the debug probe to the Raspberry Pi Pico
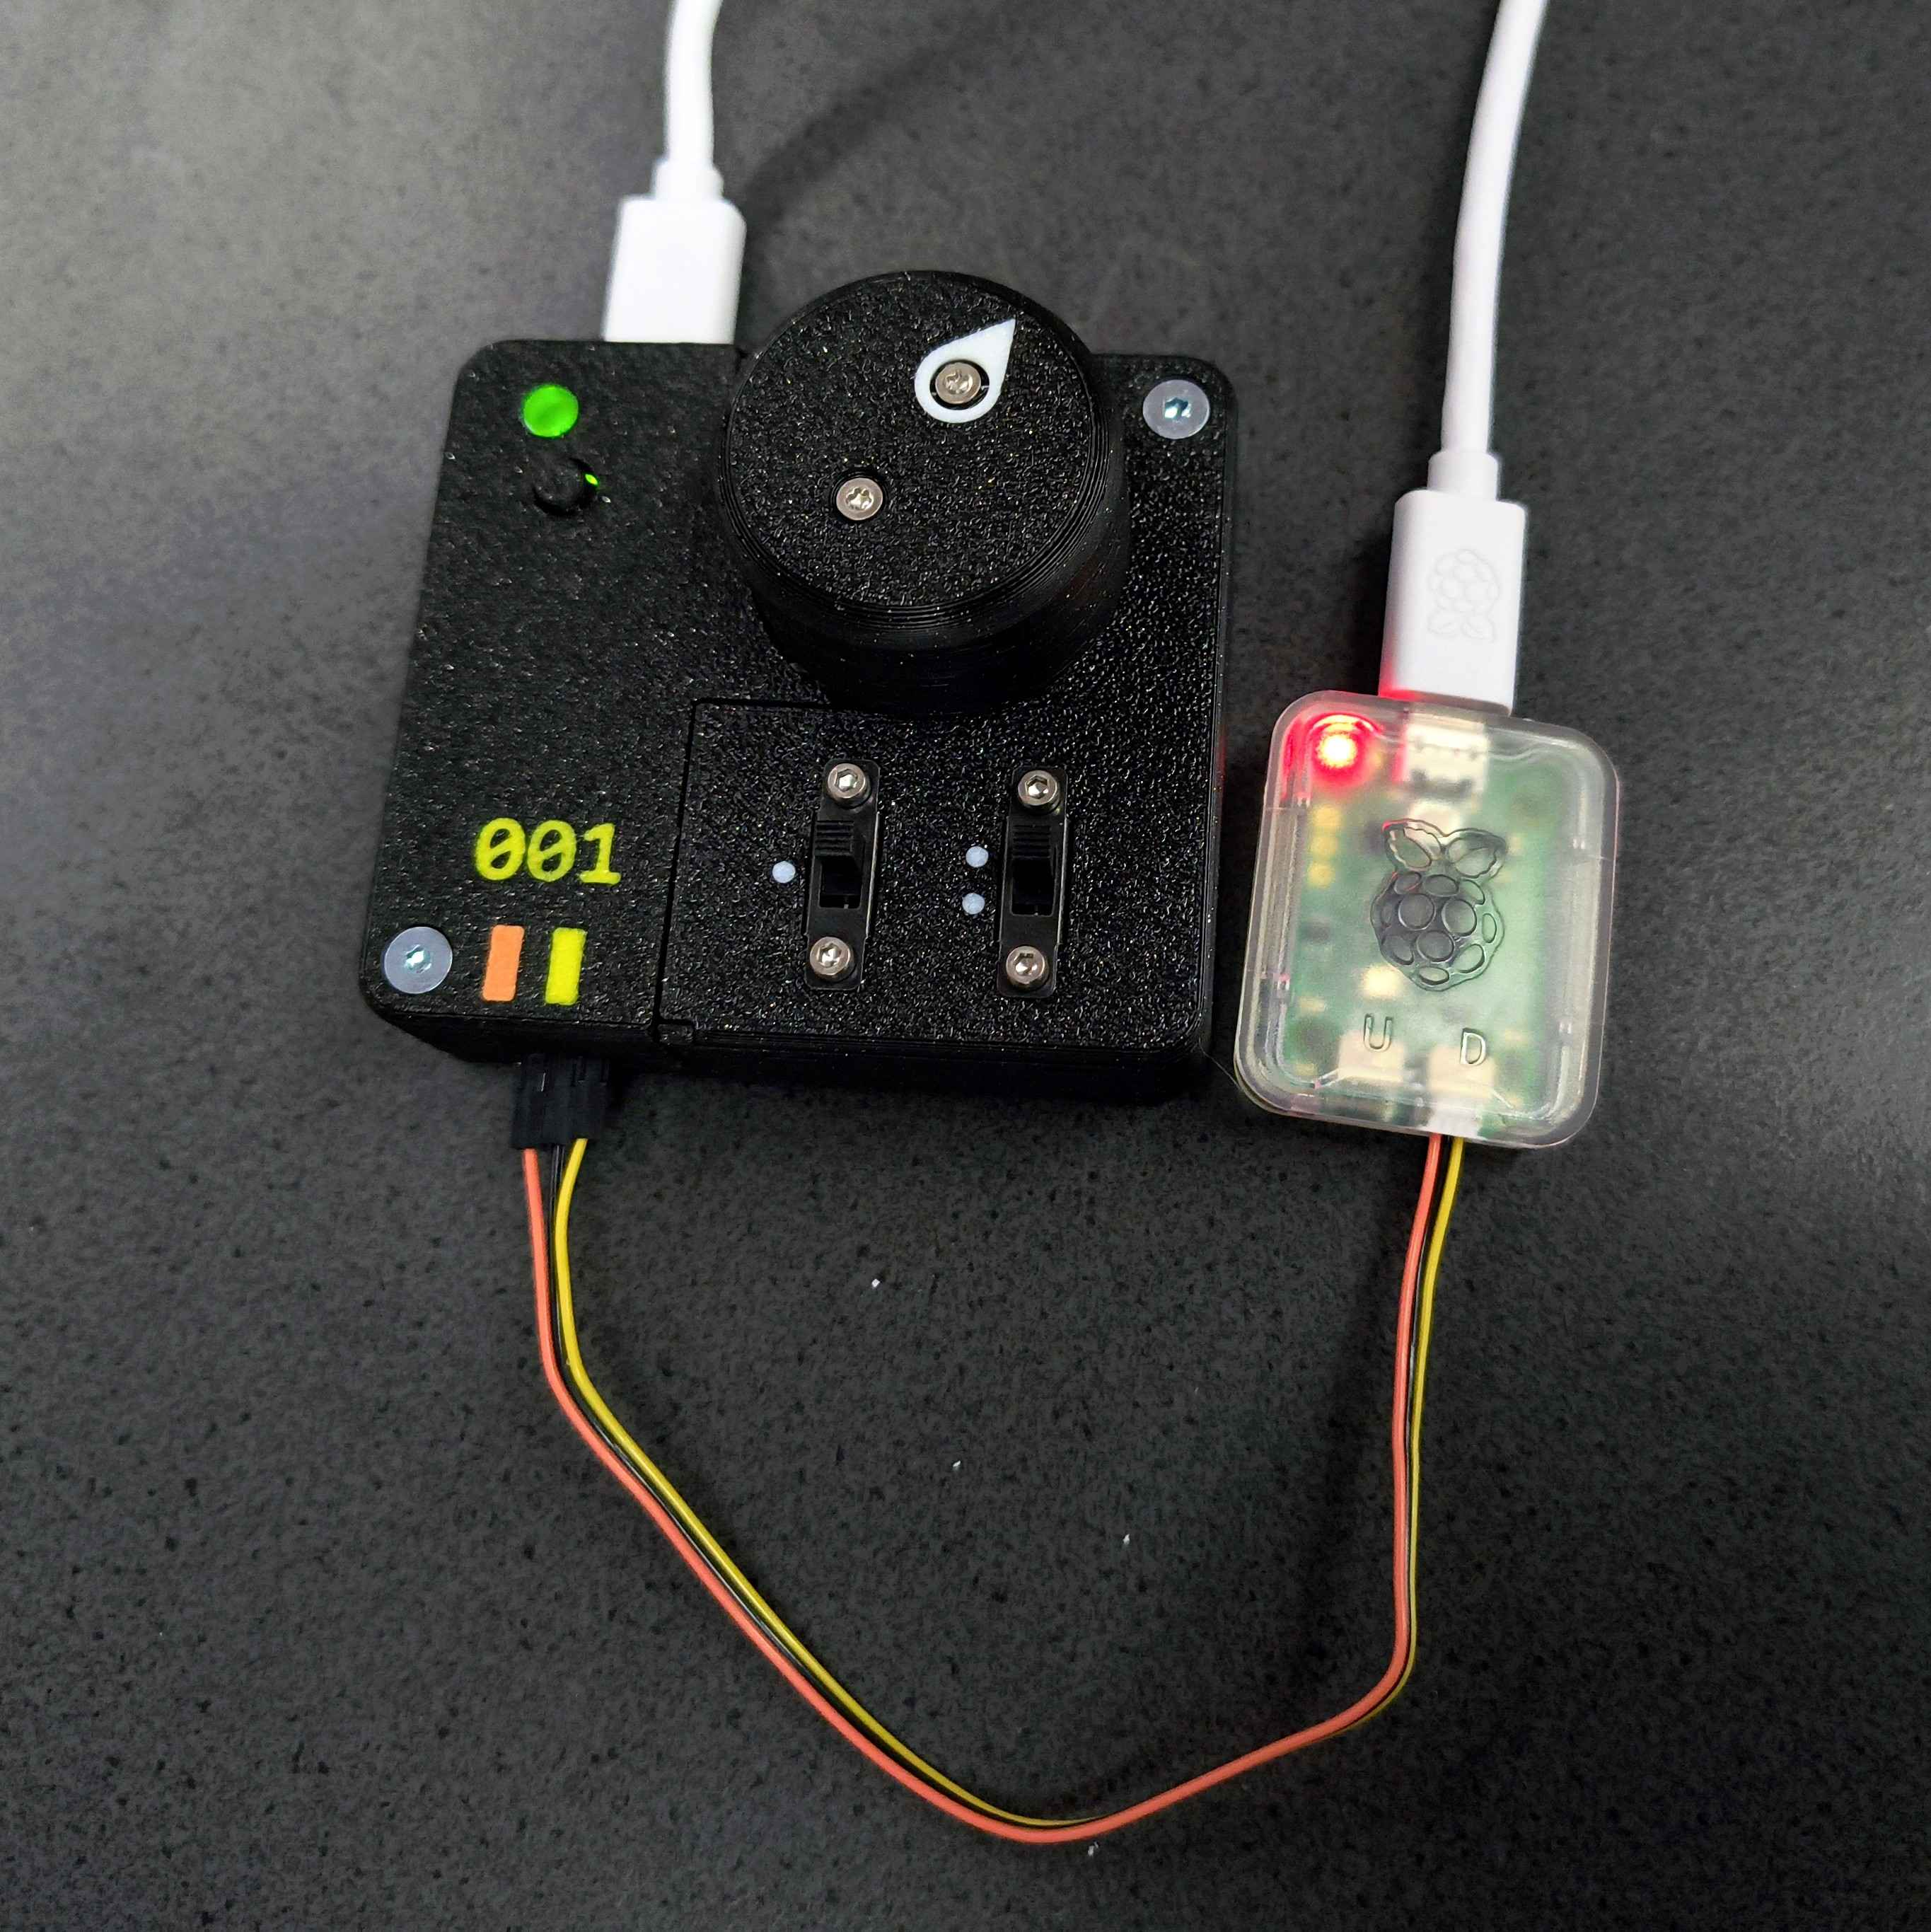
Connect the debug probe to the Student hardware as shown below. Do not connect any of the USB cables to the computer yet. If you are unsure or think you made a mistake, ask a tutor for help before continuing. 
Make sure that the orange-black-yellow cable is connected to the right port of the debug probe labelled D and the cables are connected to the matching colors on the student hardware.
Step 2: Connecting to the computer
Windows
Open a new terminal (
cmd.exe)Before connecting any of the USB cables, run the following command:

Make a note of the COM ports that are listed. These ports are other devices.
Connect the USB cable from the debug probe to the computer.
Run the command from step 2 again and note the new COM port that appeared. This is the COM port of the debug probe.
Now connect the USB cable from the Raspberry Pi Pico to the computer.
Run the command from step 2 again and note the new COM port that appeared. This is the COM port of the Raspberry Pi Pico.
Linux / MacOS
Open a new terminal
Before connecting any of the USB cables, run the following command:
Make a note of the ACM ports that are listed.
Connect the USB cable from the debug probe to the computer.
Run the command from step 2 again and note the new ACM port that appeared. This is the ACM port of the debug probe.
Now connect the USB cable from the Raspberry Pi Pico to the computer.
Run the command from step 2 again and note the new ACM port that appeared. This is the ACM port of the Raspberry Pi Pico.